JavaScript Async Await Fetch and Display data from API
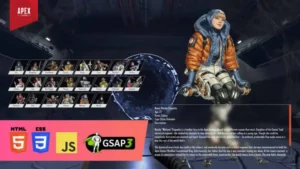
In this short tutorial, I will re-use some of the code I wrote for a YouTube tutorial creating an Apex Legend-inspired menu. I will make a simple function that fetches data from a dummy API and display some of it on the page.
All you need for this project is a modern web browser and a code editor of your choice.
Project Structure
For this project, all you need is to create a new project folder and create the two files – “index.html” and “script.js”. You can name your project folder whatever you like.
📂 Project_Name
 🌍 index.html
 📜 script.js
Create HTML Structure
Start by creating a very basic HTML5 page.
<!DOCTYPE html>
<html lang="en">

<head>
  <meta charset="UTF-8">
  <meta http-equiv="X-UA-Compatible" content="IE=edge">
  <meta name="viewport" content="width=device-width, initial-scale=1.0">
  <title>Apex Legends</title>
</head>

<body>
	Hell World
</body>

</html>
Inside the “<head></head>” elements is where we need to link our “script.js” file. The “script.js” file is where we are going to write the JavaScript logic in order to fetch the data and display it on the page.
<!DOCTYPE html>
<html lang="en">

<head>
  <meta charset="UTF-8">
  <meta http-equiv="X-UA-Compatible" content="IE=edge">
  <meta name="viewport" content="width=device-width, initial-scale=1.0">
  <title>Apex Legends</title>
  <script src="script.js" defer></script>
</head>

<body>
	Hello World
</body>

</html>
Now inside the “<body></body>” elements is where we need to create a “UL” element so we can select it with JavaScript and insert the data from an API. This UL will have an ID of “legends”. The ID will make the selection much easier for us.
<!DOCTYPE html>
<html lang="en">

<head>
  <meta charset="UTF-8">
  <meta http-equiv="X-UA-Compatible" content="IE=edge">
  <meta name="viewport" content="width=device-width, initial-scale=1.0">
  <title>Apex Legends</title>
  <script src="script.js" defer></script>
</head>

<body>
	<!-- List of Data -->
    <ul id="legends"></ul>
</body>

</html>
JavaScript Logic
Finally, we can look into JavaScript Logic. Instead of explaining everything step by step, I am going to put comments so you understand how everything works.
// Add the API URL
const url = "https://raddythebrand.github.io/apex-legends/data.json";

// Select the legends UL from our HTML File
const ul = document.getElementById('legends');

// Create a DocumentFragment (explained below)
const list = document.createDocumentFragment();

// Create Asynchronous function to grab the data
async function getData() {
  try {
    // We are using fetch to get the response
    const response = await fetch(url);
    const data = await response.json();

    // Trigger the listData function and pass the result
    listData(data);
  } catch (error) {
    console.log(error);
  }
}

// Create a function that will insert the data into our legends UL.
function listData(data) {
  // Loop through each result and append the data.
  data.map(function (legend) {
    const legendText = `
      <div class="nickname">${legend.nickname}</div>
    `;
    const item = document.createElement('li');
    item.innerHTML = legendText;
    list.appendChild(item);
  });
  // Finally append all the data to the UL.
  ul.appendChild(list);
}

// Start the getData function
getData();
And that’s pretty much it.
Finally
You should be able to now open the “index.html” file in the browser and see the data rendered on your page.
JS Code no Comments
Here is the full JavaScript code without the comments:
const url = "https://raddythebrand.github.io/apex-legends/data.json";
const ul = document.getElementById('legends');
const list = document.createDocumentFragment();

async function getData() {
  try {
    const response = await fetch(url);
    const data = await response.json();

    listData(data);
  } catch (error) {
    console.log(error);
  }
}

function listData(data) {
  data.map(function (legend) {
    const legendText = `
      <div class="nickname">${legend.nickname}</div>
    `;
    const item = document.createElement('li');
    item.innerHTML = legendText;
    list.appendChild(item);
  });
  ul.appendChild(list);
}

getData();
About CreateDocumentFragment
DocumentFragments are DOM Node objects which are never part of the main DOM tree. The usual use case is to create the document fragment, append elements to the document fragment and then append the document fragment to the DOM tree. In the DOM tree, the document fragment is replaced by all its children.
Since the document fragment is in memory and not part of the main DOM tree, appending children to it does not cause page reflow (computation of element’s position and geometry). Historically, using document fragments could result in better performance.
You can also use the DocumentFragment constructor to create a new fragment:
const fragment = new DocumentFragment();
Source: Mozilla Developer
Thank you for reading this article. Share it with friends, pets and family.
Thank you for reading this article. Please consider subscribing to my YouTube Channel. It’s FREE!
More Resources:
Support This Work
If you found this guide helpful, consider supporting me with a small donation. Your contribution helps me keep these tutorials up to date and create more quality content.

Scan to donate
