Build Simple REST API With NodeJs, ExpressJs And MongoDB
In this tutorial, we are going to build a very simple CRUD Rest API using NodeJs, ExpressJs & MongoDB (mongoose).
1) Let’s start by creating a new application with Node.js.
To do that, create a new project folder and then run the following command in Command Line (Mac / Linux) or Powershell (Windows).
npm init
This will initialise a new project for you and it’s going to ask you a few questions about your project. The most important one is to give your package a name and then you can just keep pressing enter until the installation is over.
You can skip all questions by adding the “-y” flag like in the example below:
npm init -y
At this point, you should see a file called package.json in your project folder.
Dependencies Installation
We have to install a few dependencies (unfortunately too many, if you ask me):
[x] cors
[x] dotenv
[x] express
[x] mongoose
Open the Command Line / Terminal / Powershell and install the dependencies listed above just like so:
npm install cors dotevn express mongoose
We can also install Nodemon so we don’t have to restart the application manually.
npm install --save-dev nodemon
Once Nodemon is installed, we need to tell our application to run with nodemon. In your package.json file add the following line under scripts:
"start": "nodemon app.js"
Your packages.json file should look similar to this:
{
  "name": "rest_movieapi",
  "version": "1.0.0",
  "description": "",
  "main": "index.js",
  "scripts": {
    "test": "echo \"Error: no test specified\" && exit 1",
    "start": "nodemon app.js" // Add this line
  },
  "keywords": [],
  "author": "",
  "license": "ISC",
  "dependencies": {
    "cors": "^2.8.5",
    "dotenv": "^10.0.0",
    "express": "^4.17.1",
    "mongoose": "^6.0.11"
  },
  "devDependencies": {
    "nodemon": "^2.0.13"
  }
}
Note that the version of the dependencies might change in the future.
Project Structure
Our project is going to be simple. We just need our main application file which we will call ‘app.js‘ and we need our home page file which we will call ‘index.ejs‘.
📂 node_modules
📂 server
 📂 controllers
  📜 movieController.js
 📂 models
  📜 db.js
  📜 movie.js
 📂 routes
  📜 movieRoutes.ejs
⚙ .env
🌍 app.js
📜 package-lock.json
📜 package-json
Creating our application – app.js
Instead of splitting everything into a separate section, I have briefly explained what each line of code does.
const express = require('express');
const cors = require('cors');
require('dotenv').config();

const app = express();
const port = process.env.PORT || 5000;

app.use(cors());
app.use(express.json());
app.use(express.urlencoded({ extended: true }));

const routes = require('./server/routes/movieRoutes.js');
app.use('/', routes);

app.listen(port, () => console.log(`Listening on port ${port}`));
Routes
Routes are our pages. Each route has a specific controller that does a specific action. For example, the first one is ‘ListMovies’ and is going to help us grab the movies from the database and list them. We’ll build the controller later.
const express = require('express');
const router = express.Router();
const movieController = require('../controllers/movieController');

/*
* APP Routes
*/
router.get('/api/movies/', movieController.listMovies);
router.post('/api/movies/', movieController.insertSingleMovie);
router.patch('/api/movies/:id', movieController.updateSingleMovie);
router.delete('/api/movies/:id', movieController.deleteSingleMovie);

module.exports = router;
2) Database Setup
To set up a new database you will need to have a MongoDB account. It’s FREE to register and they give you a FREE cluster to try out. Navigate to the official website.
Your dashboard should look similar to the picture below minus the cluster. We need to create one. Click on ‘+ Create‘ to create your free cluster. I won’t go into details on how to do that since is fairly straightforward. Once you are done, go back to your dashboard and you should see your cluster just like I have in the image below.

The next very important bit is to allow Network Access. You will only be able to connect to your cluster from the IP Addresses you assign.
You can simple click on ‘+ ADD IP ADDRESS‘ and add yours there.

Next, we need Database Access. Click on the Database Access tab and create a new user and a password unless you already have one. You will need to have both to make the database connection later.

Next, we need to go back to the Database tab and click on Connect.
This should give you a few options. Click on ‘Connect your application‘.

Now you need to copy and make a note of the connection string below. Note that in this case ‘raddy’ is the username, ‘<password>‘ needs to be replaced with the password that you created earlier in the ‘Database Access‘ tab and ‘myFirstDatabase‘ is the name of the database you want to create. You can change the name of the database to something like ‘Movies‘. Copy the Connection string so we can add it to our ‘.env‘ file in the next step.

That’s our MongoDB Atlas setup. Now we can go back to code and do our first query.
Databse Connection & Category Schema
To start with let’s add our connection string to our ‘.env’ file.
MONGODB_URI = mongodb+srv://raddy:<password>@cluster0.6m5cz.mongodb.net/Movies?retryWrites=true&w=majority
Now let’s create our database connection file that can be used later in our movieController.
const mongoose = require('mongoose');
mongoose.connect(process.env.MONGODB_URI, { useNewURLParser: true, useUnifiedTopology: true });

const db = mongoose.connection;
db.on('error', console.error.bind(console, 'connection error'));
db.once('open', function(){
  console.log('Connected')
});
Our Schema is going to be fairly simple. We only have 4 fields and they are all set as required.
const mongoose = require('mongoose');

const movieSchema = new mongoose.Schema({
  name: {
    type: String,
    required: 'This field is required'
  },
  description: {
    type: String,
    required: true
  },
  category: {
    type: Array,
    require: true
  },
  thumbnail: {
    type: String,
    required: true
  }
});

movieSchema.index({ "$**" : 'text' });
module.exports = mongoose.model('Movie', movieSchema);
Insert DummyData
At the top of the file, we need to require our database connection and our movie model. After that, we can focus on creating each controller individually. As you can see I’ve been very descriptive so you know what they all do.
require('../models/db');
const Movie = require('../models/movie');


/**
* /api/movies/
* GET All Movies
*/
exports.listMovies = async(req, res) => {
  let { limit = 10, page = 1, category, q } = req.query;

  const limitRecords = parseInt(limit);
  const skip = (page -1) * limit;

  let query = {};
  if(q) {
    query = {$text: {$search: q}};
  }
  if(category) query.category = category;


  try {
    const movies = await Movie.find(query).limit(limitRecords).skip(skip);
    res.json({ page: page, limit:limitRecords, movies});
  } catch (err) {
    res.status(400).json( {message: err })
  }
}


/**
* /api/movies/
* POST Single Movie
*/
exports.insertSingleMovie = async(req, res) => {

  const newMovie = new Movie({
    name: req.body.name,
    description: req.body.description,
    category: req.body.category,
    thumbnail: req.body.thumbnail
  });

  try {
    await newMovie.save();
    res.json(newMovie);
  } catch (err) {
    res.status(400).json( { message: err })
  }
}


/**
* /api/movies/:id
* PATCH Single Movie
*/
exports.updateSingleMovie = async(req, res) => {
  let paramID = req.params.id;
  let name = req.body.name;

  try {
    const updateMovie = await Movie.updateOne({ _id:paramID }, { name:name });
    res.json(updateMovie);
  } catch (error) {
    res.status(400).json( { message: err })
  }
}


/**
* /api/movies/:id
* DELETE Single Movie
*/
exports.deleteSingleMovie = async(req, res) => {
  let paramID = req.params.id;

  try {
    const data = await Movie.deleteOne({ _id:paramID });
    res.json(data);
  } catch (error) {
    res.status(400).json( { message: err })
  }
}
Run
To run your application, open your console and run “app.js” with nodemon by doing the following:
npm start
This should run the application and you should be able to the website we just created under ‘localhost:5000‘.
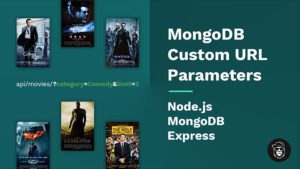
You can insert data manually, or feel free to use the dummy data that I have collected from IMDB.
Insert Dummy Data
I’ve collected some movies data from IMDB which we can insert by creating a function. Make sure that you remove the function once you run it as it’s going to keep inserting movies every time you run the application.
You can add the following code under the controllers. Save the application and N
async function insertMovies(){
  try {
    await Movie.insertMany([
      {
        "name": "Casino Royale",
        "description": "After earning 00 status and a licence to kill, secret agent James Bond sets out on his first mission as 007. Bond must defeat a private banker funding terrorists in a high-stakes game of poker at Casino Royale, Montenegro.",
        "category": ["Action", "Adventure", "Thriller"],
        "thumbnail": "casino-royale.jpg"
      },
      {
        "name": "Titanic",
        "description": "A seventeen-year-old aristocrat falls in love with a kind but poor artist aboard the luxurious, ill-fated R.M.S. Titanic.",
        "category": ["Drama", "Romance"],
        "thumbnail": "titanic.jpg"
      },
      {
        "name": "Heat",
        "description": "A group of high-end professional thieves start to feel the heat from the LAPD when they unknowingly leave a clue at their latest heist.",
        "category": ["Crime", "Drama", "Thriller"],
        "thumbnail": "heat.jpg"
      },
      {
        "name": "Scream",
        "description": "A year after the murder of her mother, a teenage girl is terrorized by a new killer, who targets the girl and her friends by using horror films as part of a deadly game.",
        "category": ["Horror", "Mistery"],
        "thumbnail": "scream.jpg"
      },
      {
        "name": "The Matrix",
        "description": "When a beautiful stranger leads computer hacker Neo to a forbidding underworld, he discovers the shocking truth--the life he knows is the elaborate deception of an evil cyber-intelligence.",
        "category": ["Action", "Sci-Fi"],
        "thumbnail": "the-matrix.jpg"
      },
      {
        "name": "The Wolf of Wall Street ",
        "description": "Based on the true story of Jordan Belfort, from his rise to a wealthy stock-broker living the high life to his fall involving crime, corruption and the federal government.",
        "category": ["Biography", "Crime", "Drama"],
        "thumbnail": "the-wolf-of-wall-street.jpg"
      },
      {
        "name": "The Shawshank Redemption",
        "description": "Two imprisoned men bond over a number of years, finding solace and eventual redemption through acts of common decency.",
        "category": ["Drama"],
        "thumbnail": "the-shawshank-redemption.jpg"
      },
      {
        "name": "Gladiator",
        "description": "A former Roman General sets out to exact vengeance against the corrupt emperor who murdered his family and sent him into slavery.",
        "category": ["Action", "Adventure", "Drama"],
        "thumbnail": "gladiator.jpg"
      },
      {
        "name": "The Godfather",
        "description": "A former Roman General sets out to exact vengeance against the corrupt emperor who murdered his family and sent him into slavery.",
        "category": ["Crime", "Drama"],
        "thumbnail": "the-godfather.jpg"
      },
      {
        "name": "The Dark Knight",
        "description": "When the menace known as the Joker wreaks havoc and chaos on the people of Gotham, Batman must accept one of the greatest psychological and physical tests of his ability to fight injustice.",
        "category": ["Action", "Crime", "Drama"],
        "thumbnail": "the-dark-knight.jpg"
      }
    ]);
  } catch (error) {
    console.log(error);
  }
}

insertMovies();
Don’t forget to remove this function after your run it.
Finally, if you found the Video Guide or this Article useful please share it with friends, family and pets. Consider subscribing to my YouTube Channel.
More Resources:
Thank you for reading this article. Please consider subscribing to my YouTube Channel. It’s FREE!
Support This Work
If you found this guide helpful, consider supporting me with a small donation. Your contribution helps me keep these tutorials up to date and create more quality content.

Scan to donate
Author
Hi! I’m Raddy. I am a web developer, often making YouTube Videos, Blog Posts and side projects. Enquiries: hello [@] raddy.co.uk